|
|||||||


|


|
|
 |
|
|
Strumenti |
 29-05-2013, 23:57
|
#1 |
|
Senior Member
Iscritto dal: Oct 2006
Messaggi: 1835
|
[Thread Aspettando\Ufficiale] Remember Me
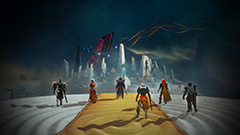
REMEMBER ME  TRAMA: 2084, Neo-Parigi. Una misteriosa catastrofe ha raso al suolo la città originale. La capitale francese, così come la conoscevamo, non esiste più. È cambiata, si è evoluta. Nuovi edifici sono sorti sui resti di monumenti storici come la Torre Eiffel, l'Arco di Trionfo e la Cattedrale di Notre Dame. Un mondo che ricorda a tratti la visione distopica di Blade Runner e Strange Days, missata magistralmente con l'essenza dell'opera 1984 di Orwell, che ha chiaramente ispirato il team Dontnod. Il primo approccio con Remember Me è nel cuore della Bastiglia, trasformata per l'occasione in un carcere di massima sicurezza dove la bella protagonista Nilin, ex-cacciatrice di ricordi, viene imprigionata e svuotata dalla multinazionale Memorize, che controlla il mercato delle memorie di ogni singolo abitante di Neo-Parigi. Quando sta per essere ridotta in stato vegetale, Nilin viene contattata dal misterioso Edge e condotta verso la libertà. Recuperando lentamente la cognizione delle proprie abilità, Nilin riesce a evadere dalla Bastiglia sfuggendo alle grinfie di un perfido e imponente mech armato fino ai denti. Dopo una fuga al cardiopalma e una spettacolare cut-scene, si chiude il breve ma intenso prologo (o Episodio Zero) di Remember Me che sancisce il ritorno nella città di Neo-Parigi. Sotto la guida di Edge, Nilin dovrà recuperare la memoria e riprendere la personale lotta alla Memorize, nel tentativo di liberare la città da un alone di oppressione ormai deprimente e insopportabile. Il sistema di gioco pare davvero intrigante! I combattimenti si baseranno sulla possibilità da parte di noi giocatori di creare le nostre combo, sfruttando le varie mosse che andremo a sbloccare con il proseguire del gioco, divise in quattro famiglie di tipi di attacco. La caratteristica però forse più interessante è la centralità, anche sul versante del gameplay, della manipolazione della memoria. Nihil ci permetterà infatti di modificare i ricordi del nostro bersaglio grazie alle sue peculiari capacità. Nella pratica, potremo rivivere il ricordo di una persona, modificandone alcuni aspetti e quindi modificando poi nel mondo reale cosa ricorderà questa persona. Scheda Tecnica:
OS: Windows Vista/XP, Windows 7, Windows 8 Processor: Intel CoreTM2 Duo 2.4 Ghz or better, AMD AthlonTM X2 2.8 Ghz or better Memory: 2 GB RAM Hard Disk Space: 9 GB free hard drive space Video Card: NVIDIA GeForce 8800GTS or better, ATI RadeonTM HD 3850 or better DirectX: 9.0c or greater Sound: Standard audio device Requisiti Raccomandati: OS: Windows Vista, Windows 7, Windows 8 Processor: Intel CoreTM 2 Quad 2.7 Ghz or better, AMD PhenomTM II X4 3 Ghz or better Memory: 4 GB RAM Hard Disk Space: 9 GB free hard drive space Video Card: NVIDIA GeForce GTX 560 or better SCREENSHOT         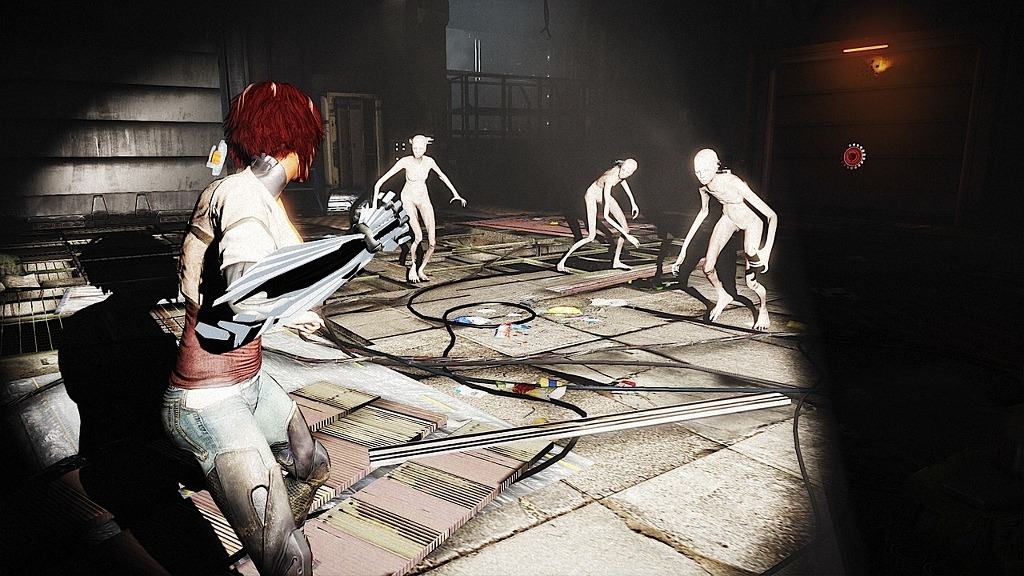 VIDEO http://www.youtube.com/watch?v=1uL84...has_verified=1 http://www.youtube.com/watch?v=Ts6eqIC9wh0 Link Utili: Sito ufficiale link steam NEWS Remember Me - Trailer della storia Remember Me - Un diario interattivo racconta i retroscena della storia Il gameplay di Remember Me in quattro nuovi video metacritic recensione spazio game
__________________
CASE:C.M. HAF 922//MOBO:Asrock z77 ext.6//CPU:I5 3570k+ Noctua nhD14//VGA:Gigabyte 970GamingG1//HD:SSD samsung 830 256 gb +WD Green 1 Tbyte//RAM:Corsair Vengeance LP 1600Mhz 2x4GB//ALISeasonic p-660W//AUDIOAsus XonarD2x//TASTRazerB.W.UltimateEdition//MouseRazerMamba 2012//MON:DELL U2414HSteam ID Ultima modifica di jonbonjovanni : 06-06-2013 alle 20:43. |

|

|
|
29-05-2013, 23:59
|
#2 |
|
Senior Member
Iscritto dal: Oct 2006
Messaggi: 1835
|
Si ringrazia CAPT.HOOK per la guida
BOOST GRAFICO REMEMBER ME: Che Remember Me sia un gioco artisticamente curato e denso di atmosfera credo siamo tutti d'accordo. Tuttavia il gioco presenta alcune piccole - medie imperfezioni nella qualita' dell'immagine e nella resa video ed e' proprio questo il motivo di questa breve guida. COME ELIMINARE LA GRANA STILE FILM: I Dontnod, artefici di questo Remember Me, hanno pensato di dare un look piu' cinematografico alla loro produzione introducendo una grana stile film Noire che rende l'immagine leggermente anticata e quasi sgranata in diversi frangenti. Se per molti questo rappresenta un pregio, io vi consiglio di provare il gioco anche senza per notare le differenze. Inoltre e' bene sottolineare che se si volesse scattare qualche screenshots durante il gameplay, la grana presente rendera' le foto molto confuse e poco nitide, proprio perche' in immagini statiche e' ancora piu' evidente che giocandoci direttamente. Per prima cosa scaricate TexMod, per chi se lo ricordasse e' lo stesso che viene comunemente usato in ME3 per importare le texture in HiRes. LINK: http://www.fileplanet.com/205418/download/Texmod-v0.9b Subito dopo il .tpf da importare con TexMod che elimina la grana. LINK: http://www50.zippyshare.com/v/66310279/file.html Questo invece e' il .tpf che elimina la grana anche dal Menu' del gioco e dalle sequenze di intermezzo. LINK: http://www29.zippyshare.com/v/3355279/file.html Ora che avrete entrambe i pacchetti e' tutto molto semplice da far funzionare. Scompattate il contenuto del primo link e copiate l'icona TexMod nel Desktop che e' piu' pratico. Aprite il tool e cliccando in alto a sinistra sull'icona della cartella, selezionate l'EXE di REMEMBER ME. Ora cliccate sull'icona piccola al centro delle colonne sempre a forma di cartella e selezionate il .TPF scaricato che per comodita' andrebbe posizionato direttamente dentro la directory del gioco. Ora che lo avrete caricato nn resta che avviare il gioco ed e' fatta. Mi raccomando NON chiudete la Mod durante l'esecuzione del gioco. SCREENS COMPARATIVI: GRAIN ON  GRAIN OFF  SWEETFX E SETTINGS: Per avere un boost dell'IQ come quello che vedete nelle seguenti immagini e' necessario l'uso di SweetFX, tool grafico diventato ormai famoso e utilizzatissimo grazie alla semplicita' della sua installazione e grazie agli stupendi risultati che e' possibile ottenere. 1. Per prima cosa scaricate il tool dal seguente LINK: http://rghost.net/46449669 Una volta fatto seguite i restanti passaggi. 2. Copiate TUTTI i file dentro la cartella di REMEMBER ME dove e' contenuto l'exe ma NON la cartella SweetFX64. Quella lasciatela in disparte. 3. Tra i file copiati ce ne e' 1 denominato SweetFX_Settings. Apritelo con il NotePad (o qualsiasi editor di testo) e sostituite TUTTO il contenuto presente con quello che trovate sotto: Codice:
   /*-----------------------------------------------------------.
  /                      Choose effects                         /
  '-----------------------------------------------------------*/

// Set to 1 for ON or 0 for OFF
#define USE_SMAA_ANTIALIASING 1 //[0 or 1] SMAA Anti-aliasing : Smoothens jagged lines using the SMAA technique.
#define USE_FXAA_ANTIALIASING 0 //[0 or 1] FXAA Anti-aliasing : Smoothens jagged lines using the FXAA technique
#define USE_CARTOON           0 //[0 or 1] Cartoon : "Toon"s the image.(Interferes with SMAA, CRT, Bloom, HDR and Lumasharpen)
#define USE_TVLEVELS          1 //[0 or 1] TVLevels : Adjusts the brightness/darkness of the scene with a straight line instead of a curve.
#define USE_ADVANCED_CRT      0 //[0 or 1] Advanced CRT : Simulates an old CRT TV display. Set gaussian blur along with it to get a halation effect
#define USE_BLOOM             0 //[0 or 1] Bloom : Makes bright lights bleed their light into their surroundings (relatively high performance cost)
#define USE_HDR               0 //[0 or 1] HDR : Not actual HDR - It just tries to mimic an HDR look (relatively high performance cost)
#define USE_LUMASHARPEN       1 //[0 or 1] LumaSharpen : Also sharpens the antialiased edges which makes them less smooth - I'm working on fixing that.
#define USE_GAUSSIAN          0 //[0 or 1] Gaussian Blur : can be used to... blur, but also bloom/hazy/glowy look, also unsharp masking
#define USE_FILMGRAIN         0 //[0 or 1] Filmgrain effect
#define USE_TECHNICOLOR       0 //[0 or 1] TECHNICOLOR : Attempts to mimic the look of an old movie using the Technicolor three-strip color process (Techicolor Process 4)
#define USE_DPX               0 //[0 or 1] Cineon DPX : Should make the image look like it's been converted to DXP Cineon - basically it's another movie-like look similar to technicolor.
#define USE_MONOCHROME        0 //[0 or 1] Monochrome : Monochrome makes the colors disappear.
#define USE_LIFTGAMMAGAIN     1 //[0 or 1] Lift Gamma Gain : Adjust brightness and color of shadows, midtones and highlights (avoids clipping)
#define USE_TONEMAP           1 //[0 or 1] Tonemap : Adjust gamma, exposure, saturation, bleach and defog. (may cause clipping)
#define USE_VIBRANCE          0 //[0 or 1] Vibrance : Intelligently saturates (or desaturates if you use negative values) the pixels depending on their original saturation.
#define USE_CURVES            1 //[0 or 1] Curves : Contrast adjustments using S-curves.
#define USE_SEPIA             0 //[0 or 1] Sepia : Sepia tones the image.
#define USE_VIGNETTE          0 //[0 or 1] Vignette : Darkens the edges of the image to make it look more like it was shot with a camera lens. May cause banding artifacts.
#define USE_DITHER            1 //[0 or 1] Dither : Applies dithering to simulate more colors than your monitor can display. This lessens banding artifacts (mostly caused by Vignette)
#define USE_BORDER            0 //[0 or 1] Border : Makes the screenedge black as a workaround for the bright edge that forcing some AA modes sometimes causes.
#define USE_SPLITSCREEN       0 //[0 or 1] Splitscreen : Enables the before-and-after splitscreen comparison mode.


   /*-----------------------------------------------------------.
  /                  SMAA Anti-aliasing settings                /
  '-----------------------------------------------------------*/

#define SMAA_THRESHOLD 0.05           //[0.05 to 0.20] Edge detection threshold. If SMAA misses some edges try lowering this slightly. I prefer between 0.08 and 0.12.
#define SMAA_MAX_SEARCH_STEPS 32      //[0 to 98] Determines the radius SMAA will search for aliased edges
#define SMAA_MAX_SEARCH_STEPS_DIAG 16  //[0 to 16] Determines the radius SMAA will search for diagonal aliased edges
#define SMAA_CORNER_ROUNDING 25        //[0 to 100] Determines the percent of antialiasing to apply to corners. 0 seems to affect fine text the least so it's the default.

// -- Advanced SMAA settings --
#define COLOR_EDGE_DETECTION 1        //[0 or 1] 1 Enables color edge detection (slower but slightly more acurate) - 0 uses luma edge detection (faster)
#define SMAA_DIRECTX9_LINEAR_BLEND 0  //[0 or 1] Using DX9 HARDWARE? (software version doesn't matter) if so this needs to be 1 - If not, leave it at 0.
                                      //Enable this only if you use a Geforce 7xxx series or older card, or a Radeon X1xxx series or older card.


   /*-----------------------------------------------------------.
  /                  FXAA Anti-aliasing settings                /
  '-----------------------------------------------------------*/
#define FXAA_QUALITY__PRESET 39      //[1 to 39] Choose the quality preset. 39 is the highest quality.
#define fxaa_Subpix 0.400            //[0.000 to 1.000] Choose the amount of sub-pixel aliasing removal.
#define fxaa_EdgeThreshold 0.250     //[0.000 to 1.000] Edge detection threshold. The minimum amount of local contrast required to apply algorithm.
#define fxaa_EdgeThresholdMin 0.060  //[0.000 to 1.000] Darkness threshold. Trims the algorithm from processing darks.


   /*-----------------------------------------------------------.
  /                  Cartoon settings                           /
  '-----------------------------------------------------------*/
#define CartoonPower 1.0             //[0.1 to 10.0] Amount of effect you want.


   /*-----------------------------------------------------------.
  /                      TVLevels settings                      /
  '-----------------------------------------------------------*/

#define DARK_LEVEL 1.7				//[0 to 255] Darkness strength. Higher values mean darker shadows, 0 means no change. Default is 16.0
#define BRIGHT_LEVEL 17.5			//[0 to 255] Brightness strength. Higher values mean brighter lights, 0 means no change. Default is 20.0


   /*-----------------------------------------------------------.
  /                  Advanced CRT settings                     /
  '----------------------------------------------------------*/
#define CRTAmount            1.00    //[0.00 to 1.00]  Amount of CRT effect you want

#define CRTResolutionX       512     //[1 to 2048]     Original input width of the game (ie. 320)
#define CRTResolutionY       304     //[1 to 2048]     Original input height of the game (ie. 240)
#define CRTgamma             2.4     //[0.0 to 4.0]    Gamma of simulated CRT (default 2.4)
#define CRTmonitorgamma      2.2     //[0.0 to 4.0]    Gamma of display monitor (typically 2.2 is correct)
#define CRTBrightness        0.9     //[1.0 to 3.0]    Used to boost brightness a little. Default is 1.0
#define CRTScanlineIntensity 2.0     //[2.0 to 4.0]    Scanlines intensity (use integer values preferably). Default is 2.0
#define CRTScanlineGaussian  1       //[0 or 1]        Use the "new nongaussian scanlines bloom effect". Default is on

#define CRTCurvature         1       //[[0 or 1]          "Barrel effect" enabled (1) or off (0)
#define CRTCurvatureRadius   1.5     //[0.0 to 2.0]       Curvature Radius (only effective when Curvature is enabled). Default is 1.5
#define CRTCornerSize        0.0100  //[0.0000 to 0.0020] Higher values, more rounded corner. Default is 0.001
#define CRTDistance          2.00    //[0.00 to 4.00]     Simulated distance from viewer to monitor. Default is 2.00
#define CRTAngleX            0.00    //[-0.20 to 0.20]    Tilt angle in radians (X coordinates)
#define CRTAngleY            -0.15   //[-0.20 to 0.20]    Tilt angle in radians (Y coordinates). (Value of -0.15 gives the 'arcade tilt' look)
#define CRTOverScan          1.01    //[1.00 to 1.10]     Overscan (e.g. 1.02 for 2% overscan). Default is 1.01
#define CRTOversample        0       //[0 or 1]           Enable 3x oversampling of the beam profile (warning : performance hit)


   /*-----------------------------------------------------------.
  /                  Bloom settings                             /
  '-----------------------------------------------------------*/
#define BloomThreshold 20.25 //[0.00 to 50.00] Threshold for what is a bright light (that causes bloom) and what isn't.
#define BloomPower 2.446     //[0.000 to 8.000] Strength of the bloom
#define BloomWidth 1.1442    //[0.0000 to 1.0000] Width of the bloom


   /*-----------------------------------------------------------.
  /                  HDR settings                               /
  '-----------------------------------------------------------*/
#define HDRPower 1.30  //[0.00 to 8.00] Strangely lowering this makes the image brighter
#define radius2  0.87  //[0.00 to 8.00] Raising this seems to make the effect stronger and also brighter


   /*-----------------------------------------------------------.
  /                  LumaSharpen settings                       /
  '-----------------------------------------------------------*/
// -- Sharpening --
#define sharp_strength 0.40   //[0.10 to 3.00] Strength of the sharpening
#define sharp_clamp    0.035  //[0.000 to 1.000] Limits maximum amount of sharpening a pixel recieves - Default is 0.035

// -- Advanced sharpening settings --
#define pattern 2        //[1|2|3|4] Choose a sample pattern. 1 = Fast, 2 = Normal, 3 = Wider, 4 = Pyramid shaped.
#define offset_bias 1.0  //[0.0 to 6.0] Offset bias adjusts the radius of the sampling pattern.
                         //I designed the pattern for offset_bias 1.0, but feel free to experiment.

// -- Debug sharpening settings --
#define show_sharpen 0   //[0 or 1] Visualize the strength of the sharpen (multiplied by 4 to see it better)


   /*-----------------------------------------------------------.
  /                  Gaussian Blur settings                     /
  '-----------------------------------------------------------*/
#define GaussEffect 2        //[0|1|2|3]        0 = Blur, 1 = Unsharpmask (expensive), 2 = Bloom, 3 = Sketchy. Default is 2
#define GaussQuality 3       //[0|1|2|3]        Warning: 2 and 3 are expensive. Default is 1
#define GaussSigma 1         //[1 to 4]         The higher the wider blur/bloom is (only effective when Bloom selected)
#define GaussBloomWarmth 1   //[0|1|2]          "Temperature" of the bloom - 0 = neutral, 1 = warm, 2 = hazy/foggy
#define GaussThreshold 0.50  //[0.00 to 1.00]   [DX10/11 only] Threshold for what is a bright light (that causes bloom) and what isn't.
#define GaussExposure 43.0   //[0.00 to 100.00] [DX10/11 only] Exposure of the effect (the lower the brighter)
#define GaussStrength 0.10   //[0.00 to 1.00]   Amount of effect blended into the final image


   /*-----------------------------------------------------------.
  /                  Film grain settings                        /
  '-----------------------------------------------------------*/
#define FilmGrainIntensity 0.46  //[0.00 to 1.00] Intensity of grain. Default is 0.46
#define FilmGrainExposure 40     //[0 to 100]     Grain Exposure. Default is 40 (Lower -> darker noise)
#define FilmGrainSize 2          //[0 to 10]      Size of the grain. Default is 2 (Higher -> thinner noise)


   /*-----------------------------------------------------------.
  /                  TECHNICOLOR settings                       /
  '-----------------------------------------------------------*/
#define TechniAmount 0.4         //[0.00 to 1.00]
#define TechniPower  4.0         //[0.00 to 8.00]
#define redNegativeAmount   0.88 //[0.00 to 1.00]
#define greenNegativeAmount 0.88 //[0.00 to 1.00]
#define blueNegativeAmount  0.88 //[0.00 to 1.00]


   /*-----------------------------------------------------------.
  /                  Cineon DPX settings                        /
  '-----------------------------------------------------------*/
#define Red   8.0  //[1.0 to 15.0]
#define Green 8.0  //[1.0 to 15.0]
#define Blue  8.0  //[1.0 to 15.0]

#define ColorGamma    2.5  //[0.1 to 2.5] Adjusts the colorfulness of the effect in a manner similar to Vibrance. 1.0 is neutral.
#define DPXSaturation 3.0  //[0.0 to 8.0] Adjust saturation of the effect. 1.0 is neutral.

#define RedC   0.36  //[0.60 to 0.20]
#define GreenC 0.36  //[0.60 to 0.20]
#define BlueC  0.34  //[0.60 to 0.20]

#define Blend 0.2    //[0.00 to 1.00] How strong the effect should be.


   /*-----------------------------------------------------------.
  /                  Monochrome settings                        /
  '-----------------------------------------------------------*/
#define Monochrome_conversion_values float3(0.18,0.41,0.41) //[0.00 to 1.00] Percentage of RGB to include (should sum up to 1.00)


   /*-----------------------------------------------------------.
  /                  Lift Gamma Gain settings                   /
  '-----------------------------------------------------------*/
#define RGB_Lift  float3(0.994, 0.994, 0.986)  //[0.000 to 2.000] Adjust shadows for Red, Green and Blue
#define RGB_Gamma float3(1.010, 1.000, 0.995)  //[0.000 to 2.000] Adjust midtones for Red, Green and Blue
#define RGB_Gain  float3(1.000, 1.000, 1.000)  //[0.000 to 2.000] Adjust highlights for Red, Green and Blue


   /*-----------------------------------------------------------.
  /                  Tonemap settings                           /
  '-----------------------------------------------------------*/
#define Gamma 0.968                         //[0.000 to 2.000] Adjust midtones
#define Exposure 0.0                     //[-1.000 to 1.000] Adjust exposure
#define Saturation -0.052                   //[-1.000 to 1.000] Adjust saturation
#define Bleach 0.0                       //[0.000 to 1.000] Brightens the shadows and fades the colors
#define Defog 0.100                       //[0.000 to 1.000] How much of the color tint to remove
#define FogColor float3(0.0, 0.022, 0.145) //[0.00 to 2.55, 0.00 to 2.55, 0.00 to 2.55] What color to remove - default is blue


   /*-----------------------------------------------------------.
  /                  Vibrance settings                          /
  '-----------------------------------------------------------*/
#define Vibrance -0.10 //[-1.00 to 1.00] Intelligently saturates (or desaturates if you use negative values) the pixels depending on their original saturation.


   /*-----------------------------------------------------------.
  /                  Curves settings                            /
  '-----------------------------------------------------------*/
#define Curves_mode 0        //[0|1|2] Choose what to apply contrast to. 0 = Luma, 1 = Chroma, 2 = both Luma and Chroma. Default is 0 (Luma)
#define Curves_contrast 0.24 //[-1.00 to 1.00] The amount of contrast you want

// -- Advanced curve settings --
#define Curves_formula 2     //[1|2|3|4|5|6|7|8|9] The contrast s-curve you want to use.
                             //1 = Sine, 2 = Abs split, 3 = Smoothstep, 4 = Exp formula, 5 = Simplified Catmull-Rom (0,0,1,1), 6 = Perlins Smootherstep
                             //7 = Abs add, 8 = Techicolor Cinestyle, 9 = Parabola.
                             //Note that Technicolor Cinestyle is practically identical to Sine, but runs slower. In fact I think the difference might only be due to rounding errors.
                             //I prefer 2 myself, but 3 is a nice alternative with a little more effect (but harsher on the highlight and shadows) and it's the fastest formula.


   /*-----------------------------------------------------------.
  /                  Sepia settings                             /
  '-----------------------------------------------------------*/
#define ColorTone float3(1.40, 1.10, 0.90) //[0.00 to 2.55, 0.00 to 2.55, 0.00 to 2.55] What color to tint the image
#define GreyPower  0.11                    //[0.00 to 1.00] How much desaturate the image before tinting it
#define SepiaPower 0.58                    //[0.00 to 1.00] How much to tint the image


   /*-----------------------------------------------------------.
  /                  Vignette settings                          /
  '-----------------------------------------------------------*/
#define VignetteRatio 1.00    //[0.15 to 6.00]  Sets a width to height ratio. 1.00 (1/1) is perfectly round, while 1.60 (16/10) is 60 % wider than it's high.
#define VignetteRadius 1.00   //[-1.00 to 3.00] lower values = stronger radial effect from center
#define VignetteAmount -1.00  //[-2.00 to 1.00] Strength of black. -2.00 = Max Black, 1.00 = Max White.
#define VignetteSlope 8       //[1 to 16] How far away from the center the change should start to really grow strong (odd numbers cause a larger fps drop than even numbers)
#define VignetteCenter float2(0.500, 0.500)  //[0.000 to 1.000, 0.000 to 1.000] Center of effect.


   /*-----------------------------------------------------------.
  /                  Dither settings                            /
  '-----------------------------------------------------------*/
#define dither_method 1  //[1 or 2] 1 = Ordering dithering (good and very fast), 2 = Random dithering (even better dithering but not as fast)

//Note that the patterns used by Dither, makes an image harder to compress.
//This can make your screenshots and video recordings take up more space.


   /*-----------------------------------------------------------.
  /                  Border settings                            /
  '-----------------------------------------------------------*/
//No settings yet, beyond switching it on or off in the top section.


   /*-----------------------------------------------------------.
  /                  Splitscreen settings                       /
  '-----------------------------------------------------------*/
#define splitscreen_mode 1  //[1|2|3|4|5]  1 = Vertical 50/50 split, 2 = Vertical 25/50/25 split, 3 = Vertical 50/50 angled split, 4 = Horizontal 50/50 split, 5 = Horizontal 25/50/25 split


   /*-----------------------------------------------------------.
  /                  Key settings                               /
  '-----------------------------------------------------------*/
// This is the section where you can define your own key mapping
// See the following URL to find out what keycode a key has:
// http://www.cambiaresearch.com/articles/15/javascript-char-codes-key-codes

// key_toggle_sweetfx = 45 ; 45 = Einfg
// key_screenshot     = 35 ; 35 = Ende->
// key_reload_sweetfx = 46 ; 46 = Entf


   /*-----------------------------------------------------------.
  /                  Misc settings                              /
  '-----------------------------------------------------------*/
// You can load and chain other DirectX wrappers (ENB, Helix, Windower...)
// If the external wrapper is already named d3d9.dll, rename it into
// something else like "d3d9_enb.dll" (note that even if this is commented it actually works)

// external_d3d9_wrapper = none
// external_dxgi_wrapper = none
5. Disattivate FRAPS se all'avvio crasha il gioco e a volte occorre disattivare anche MSI AB o EVGA PRECISION qualora lo usaste. 6. Fate partire il gioco. Enjoy! Il gioco parte direttamente con la MOD inserita ma e' possibile disattivarla in qualsiasi momento direttamente premendo ll tasto BLOCC_SCORR che serve infatti per ATTIVARE/DISATTIVARE la mod. Noterete immediatamente il cambiamento a livello visivo e il miglioramento dell'intera scena. Se volete il mio modesto parere, e' ASSOLUTAMENTE da provare. SGSSAA PER REMEMBER ME Tramite Inspector selezionate il seguente profilo a posto di quello esistente: 0x080000C1 e forzate l'AA SGSSAA a piacere. Occhio che diventa molto pesante come gioco e visto che personalmente nn ne sento la necessita', preferisco usare una res piu' alta o il SuperCampionamento del gioco che male nn e' affatto. TASTI SPECIALI PER FOTO SPECIALI Durante le sessioni di gioco nasce a volte l'esigenza di scattare qualche foto da postare sul forum o semplicemente per immortalare un particolare scorcio e angolo della citta'..e ce ne sono davvero moltissimi degni di nota. Purtroppo non sempre questo processo regala la soddisfazione sperata ed ecco che subentra la necessita' di spaziare con la telecamera in modo da inquadrare esclivamente cio' che desideriamo fotografare, aumentando magari anche il FOV per prendere un panorama per intero. Parliamo ovviamente di comandi inutili ai fini del gioco ma per gli amanti degli screenshots si trattera' di una vera e propria manna dal cielo. E' tutto molto semplice. Aprite il file ExampleInput.ini dentro documenti e aggiungete in fondo alla pagina queste stringhe, nella sezione Engine.PlayerInput. Ricordo che funziona con molti titoli che sfruttano l'U3 Engine, tipo Bioshock, DMC...etc. Ho riportato affianco l'effetto che produce. Bindings=(Name="F1",Command="PlayersOnly") - Timestop Bindings=(Name="F2",Command="Ghost") - NoClip ON Bindings=(Name="F3",Command="Walk") - NoClip mode OFF Bindings=(Name="F10",Command="FOV 90") - Field of View custom Bindings=(Name="F12",Command="FOV 0") - Standard Field of View. NOTA 1: Nelle Cutscene e' consigliato togliere il FOV custom poiche' taglia parte della scena. NOTA 2: Ora il FOV e' impostato a 90, ma potrete usare valori come 10,40,60,90,110 a seconda dei gusti. C'e' solo da perderci 5 minuti. Ora che abbiamo finito potrete godervi REMEMBER ME con questa resa video e magari postare i vostri scatti piu' belli, oltre che ovviamente le vostre impressioni su gioco.   
Ultima modifica di jonbonjovanni : 07-06-2013 alle 16:58. |
|
|
|
|
30-05-2013, 01:13
|
#3 |
|
Senior Member
Iscritto dal: Apr 2002
Città: R'lyeh
Messaggi: 12527
|
Interessato!
__________________
Questa è poesia! |
|
|
|
|
30-05-2013, 05:53
|
#4 |
|
Senior Member
Iscritto dal: Oct 2006
Città: Sydney
Messaggi: 636
|
Sembra interessante.
__________________
Corsair Vengeance C70 Military Green | Intel i5 3570K @ 4,5ghz - 1,16v | Asrock Z77 Extreme 6 | MSI GTX 670 Power Edition OC| Corsair Vengeance 1600Mhz 16Gb | SSD Samsung 830 128gb | Corsair TX850m | Corsair H80 | Corsair Vengeance 1500 Dolby 7.1 | Corsair K95 | Corsair M65 | Asus VE278Q |
|
|
|
|
30-05-2013, 08:09
|
#5 |
|
Senior Member
Iscritto dal: Jul 2008
Città: Falconara Marittima
Messaggi: 27665
|
Titolo al quale mi sono interessato tempo fa; interesse che purtroppo è calato col passare del tempo in quanto il gioco sembra focalizzato sui combattimenti e le combo (per carità, sembrano avere meccaniche interessanti) e come per i titoli di ultima generazione più sull'aspetto cinematografico (cut-scenes, spettacolarizzazione) che sul gameplay.
Rimango comunque in attesa, anche perchè sembra una realizzazione ben fatta.
__________________
ARCANA TALES (Ruleset GdR) - Thread ufficiali ● Profilo Steam ● Fate/Stay Night ● Foto Astronomia
PC: CPU (Artoria): AMD 9800X3D MB (Jeanne): Gigabyte AORUS Elite B850 WiFi7 ICE GPU (Nero): MSI Ventus 3X RTX 5080 RAM: Kingston FURY Renegade 2x16GB DDR5 6000MHz - M.2: Samsung 990 PRO 2TB SCHERMO: LG UltraGear OLED 39GS95QE |
|
|
|
|
30-05-2013, 08:21
|
#6 | |
|
Senior Member
Iscritto dal: Oct 2006
Messaggi: 1835
|
Quote:
Comunque aspettiamo che esca per vedere se merita,guardate il secondo video è bellissimo ,inoltre ultimamente ho giocato a Dmc su xbox e devo dire che se non fosse stato così breve ,dal mio punto di vista sarebbe stato un capolavoro Inviato dal mio ASUS Transformer Pad TF300T con Tapatalk 2
__________________
CASE:C.M. HAF 922//MOBO:Asrock z77 ext.6//CPU:I5 3570k+ Noctua nhD14//VGA:Gigabyte 970GamingG1//HD:SSD samsung 830 256 gb +WD Green 1 Tbyte//RAM:Corsair Vengeance LP 1600Mhz 2x4GB//ALISeasonic p-660W//AUDIOAsus XonarD2x//TASTRazerB.W.UltimateEdition//MouseRazerMamba 2012//MON:DELL U2414HSteam ID Ultima modifica di jonbonjovanni : 30-05-2013 alle 08:31. |
|
|
|
|

|
30-05-2013, 09:10
|
#7 |
|
Senior Member
Iscritto dal: Jul 2006
Messaggi: 8152
|
Seguo con interesse moderato
__________________
 "Quiquid Latine Dictum Sit, Altum Sonatur" 😐 "Quiquid Latine Dictum Sit, Altum Sonatur" 😐
|
|
|
|
|
30-05-2013, 11:05
|
#8 |
|
Senior Member
Iscritto dal: Jul 2005
Messaggi: 3683
|
Non mi è ben chiaro se si tratta di un open world o no. Nel primo caso sarebbe senza dubbio interessante girare per una Parigi cyberpunk, nel secondo... sarebbe una sorta di action? dubito che possa raggiungere anche solo i livelli (non eccelsi) di DmC.
|
|
|
|
|
30-05-2013, 11:15
|
#9 |
|
Senior Member
Iscritto dal: Jul 2008
Città: Falconara Marittima
Messaggi: 27665
|
Mi pare che NON fosse Open-World. D'altro canto, come già detto, il fulcro dovrebbero essere gli scontri.
Sul fatto di non raggiungere certi livelli sono invece ottimista: dal poco che avevo visto e letto a riguardo tempo fa, mi era rimasta una buonissima impressione. Secondo me il problema di questo gioco non è se sarà un buon prodotto, ma cercare di capire bene il target nel quale andrà a collocarsi.
__________________
ARCANA TALES (Ruleset GdR) - Thread ufficiali ● Profilo Steam ● Fate/Stay Night ● Foto Astronomia
PC: CPU (Artoria): AMD 9800X3D MB (Jeanne): Gigabyte AORUS Elite B850 WiFi7 ICE GPU (Nero): MSI Ventus 3X RTX 5080 RAM: Kingston FURY Renegade 2x16GB DDR5 6000MHz - M.2: Samsung 990 PRO 2TB SCHERMO: LG UltraGear OLED 39GS95QE |
|
|
|
|
30-05-2013, 11:27
|
#10 |
|
Senior Member
Iscritto dal: Oct 2006
Messaggi: 1835
|
@Necroticism
Allora da questo video link sembrerebbe di si , più vedo video e più mi piace
__________________
CASE:C.M. HAF 922//MOBO:Asrock z77 ext.6//CPU:I5 3570k+ Noctua nhD14//VGA:Gigabyte 970GamingG1//HD:SSD samsung 830 256 gb +WD Green 1 Tbyte//RAM:Corsair Vengeance LP 1600Mhz 2x4GB//ALISeasonic p-660W//AUDIOAsus XonarD2x//TASTRazerB.W.UltimateEdition//MouseRazerMamba 2012//MON:DELL U2414HSteam ID |
|
|
|
|
31-05-2013, 10:13
|
#12 | ||
|
Senior Member
Iscritto dal: May 2007
Messaggi: 26501
|
Per rispondere a Necroticism, all'inizio non era chiaro se si trattasse di un open-world oppure di un gioco con struttura lineare. A complicare le cose ci furono alcune preview relative ai primi video di gameplay (quindi della passata estate) che parlavano di:
Quote:
Ma è dello scorso aprile la smentita definitiva da parte dei DEV, con la specifica che si tratta di un titolo lineare: Quote:
__________________
Pentiment | JWE 2 | Oxenfree | Kholat | Horizon Forbidden West | Outcast | Outcast SC | Outcast 2 | TW3 [post] |
||
|
|
|
|
31-05-2013, 10:34
|
#13 |
|
Senior Member
Iscritto dal: Jul 2005
Messaggi: 3683
|
Grazie!
|
|
|
|
|
31-05-2013, 10:49
|
#14 |
|
Senior Member
Iscritto dal: May 2006
Messaggi: 4347
|
A me intrippa parecchio come gioco, mi ricorda ONI un gioco che ho amato tantissimo e se il CS è come quello di Batman mi divertirò anche di più!
__________________
Ci manchi Lowenz! |
|
|
|
|
31-05-2013, 11:15
|
#15 | |
|
Senior Member
Iscritto dal: Oct 2006
Messaggi: 1835
|
Quote:
__________________
CASE:C.M. HAF 922//MOBO:Asrock z77 ext.6//CPU:I5 3570k+ Noctua nhD14//VGA:Gigabyte 970GamingG1//HD:SSD samsung 830 256 gb +WD Green 1 Tbyte//RAM:Corsair Vengeance LP 1600Mhz 2x4GB//ALISeasonic p-660W//AUDIOAsus XonarD2x//TASTRazerB.W.UltimateEdition//MouseRazerMamba 2012//MON:DELL U2414HSteam ID |
|
|
|
|
|
31-05-2013, 12:46
|
#16 |
|
Senior Member
Iscritto dal: Apr 2002
Città: R'lyeh
Messaggi: 12527
|
Io vado controtendenza, ma il fatto che sia lineare per me è un Pro, se fosse stato open world non lo avrei degnato nemmeno di striscio
__________________
Questa è poesia! Ultima modifica di Custode : 01-06-2013 alle 13:25. |
|
|
|
|
31-05-2013, 13:58
|
#17 | |
|
Senior Member
Iscritto dal: Oct 2006
Messaggi: 1835
|
Quote:
 Inviato dal mio GT-I9100 con Tapatalk 2
__________________
CASE:C.M. HAF 922//MOBO:Asrock z77 ext.6//CPU:I5 3570k+ Noctua nhD14//VGA:Gigabyte 970GamingG1//HD:SSD samsung 830 256 gb +WD Green 1 Tbyte//RAM:Corsair Vengeance LP 1600Mhz 2x4GB//ALISeasonic p-660W//AUDIOAsus XonarD2x//TASTRazerB.W.UltimateEdition//MouseRazerMamba 2012//MON:DELL U2414HSteam ID |
|
|
|
|
|
31-05-2013, 15:48
|
#18 | |
|
Senior Member
Iscritto dal: Mar 2006
Città: Torino
Messaggi: 10899
|
Quote:
in trepidante attesa...
__________________
BAU!  Case: Corsair Graphite 600T silver PSU: Seasonic G-650 CPU: Intel 2500k Cooler: Corsair H100i Main: Biostar TZ77XE4 RAM: 4x2 gb Corsair vengeance ddr3 1600mhz low profile VGA: nVidia Evga GTX 1070 FTW Gaming Acx 3.0 8GB Audio: Asus Xonar D2+SennheiserPC 350 Special Edition 2015 HDD: Samsung 840 250GB+WD black 1tb sata3+samsung 500gb+lacie 1tb Monitor: LG IPS235P-BN S.O: Windows 10 Pro x64 M&K: Logitech g19+g500 Case: Corsair Graphite 600T silver PSU: Seasonic G-650 CPU: Intel 2500k Cooler: Corsair H100i Main: Biostar TZ77XE4 RAM: 4x2 gb Corsair vengeance ddr3 1600mhz low profile VGA: nVidia Evga GTX 1070 FTW Gaming Acx 3.0 8GB Audio: Asus Xonar D2+SennheiserPC 350 Special Edition 2015 HDD: Samsung 840 250GB+WD black 1tb sata3+samsung 500gb+lacie 1tb Monitor: LG IPS235P-BN S.O: Windows 10 Pro x64 M&K: Logitech g19+g500
|
|
|
|
|
|
01-06-2013, 13:27
|
#19 |
|
Senior Member
Iscritto dal: Apr 2002
Città: R'lyeh
Messaggi: 12527
|
Screenshot versione PC:
http://www.neogaf.com/forum/showpost...13&postcount=1 Se andate qui: http://deadendthrills.com/ li sta inserendo un pò alla volta, potete clikkarci e vederli in altissima risoluzione, sono elencati anche i setting utilizzati Mio al day one, sperando sia anche un buon gioco.
__________________
Questa è poesia! |
|
|
|
|
01-06-2013, 13:35
|
#20 |
|
Senior Member
Iscritto dal: Oct 2006
Messaggi: 1835
|
nuovo live trailer per remember me link
Capcom e Dontnod Entertainment hanno rilasciato un live trailer per Remember Me, l'action game che sarà disponibile a partire dal 7 giugno su PlayStation 3, Xbox 360 e PC. Il video ci introduce all'ambientazione e alla trama, ma la protagonista, Nilin, si vede solo per alcuni istanti. Nel corso dell'avventura il suo obiettivo sarà quello di recuperare la memoria in seguito a una trappola ordita dalla stessa agenzia per cui lavorava come cacciatrice di ricordi. Fonte allgamesbeta
__________________
CASE:C.M. HAF 922//MOBO:Asrock z77 ext.6//CPU:I5 3570k+ Noctua nhD14//VGA:Gigabyte 970GamingG1//HD:SSD samsung 830 256 gb +WD Green 1 Tbyte//RAM:Corsair Vengeance LP 1600Mhz 2x4GB//ALISeasonic p-660W//AUDIOAsus XonarD2x//TASTRazerB.W.UltimateEdition//MouseRazerMamba 2012//MON:DELL U2414HSteam ID Ultima modifica di jonbonjovanni : 01-06-2013 alle 13:39. |
|
|
|
|
|
| Strumenti | |


|
|

Tutti gli orari sono GMT +1. Ora sono le: 22:15.